A not so simple Druid Guide for Ares Battlefield
by AresOmega
Who am I
Hi there, I am AresOmega, and I am a Druid main. You must have seen me around in the IC Discord, mainly in the #eu-discussion room. I have been playing Druid and other defensive lineups since Ares Season 1, and I have tried to compete against the meta of each season through thick and thin with this class. I have managed a Top 3 finish during season 3 and a Top 1 finish during season 4, and I am comfortable saying that I can share my accumulated knowledge with everyone that reads this guide. Before we begin, I want to thank a great group of Top EU players that pushed me during Season 4 a lot with their great gameplay and game knowledge in order to hone my skills: Yuki, Hobahken, Risee and Saphy, you are all part of this experience.
You will like playing Druid if:
- You like long games (stall or attrition based)
- You like maximizing unit value
- You like delving deeper into game mechanics
- You feel safe with a full health bar You like metagaming with many toolbox choices You like the units the team uses
You should not play Druid if you:
- Don’t like long games and prefer a fast exchange
- Don’t don’t like the units
- Don’t have enough resources to get the units at a high lens/awakened
- Don’t want to have to play around many of the popular units and mechanics (Fenebeth Curse, Shields, Axe Cycling)
- Don’t like low damage output over a short period of time
A brief History of Druid
Druid in the first seasons of Ares was always subpar. It used to utilize the Phoebe Recycle core in order to maximize survivability, alongside some Defensive guardian choices to protect your few damage dealers. However, the Hybrid Sorcerer comp used the exact same logic but instead of the average impact Guardians, it used powerful sorcerer units that dealt tons of damage and made quick work of the Druid defenses. Being the last leader to be reworked didn’t help either, since he was split between using Lights, Guardians and Summoners to get all of his passive, meaning you had to chose 5 of them instead of the full 6.This made him a worse choice than Paladin, and a way worse choice than the aforementioned Reaper team who were better at stalling (and killing the enemy in the case of Reaper). During season 3 and 4, Druid got 2 huge buffs: His rework that among other thing provided him with a 40% AoE reduction, and Grant (another 80% AoE reduction on his lane) making him arguably one of the strongest classes in the game.
Team Builds and Playstyles:
There are a couple of variations to playing Druid and the game plan adjusts accordingly.
CP-Stall
First of all, the most effective version is the CP Stall setup. With the Ares rules changes from season 4 onwards, the player with the most HP after the time has ended wins the match. If both are at full HP, the player with the maximum amount of CP in the team they run at this moment wins the game instead. If you are sure you have more CP than the people you face, playing this kind of druid will give you a solid edge. Depending on the range you plan on playing in, this might be easier or harder to achieve. Ares Top 10 players tend to have way more CP than lower tier people due to the amount of Awakenings and UR items they are using on their team.
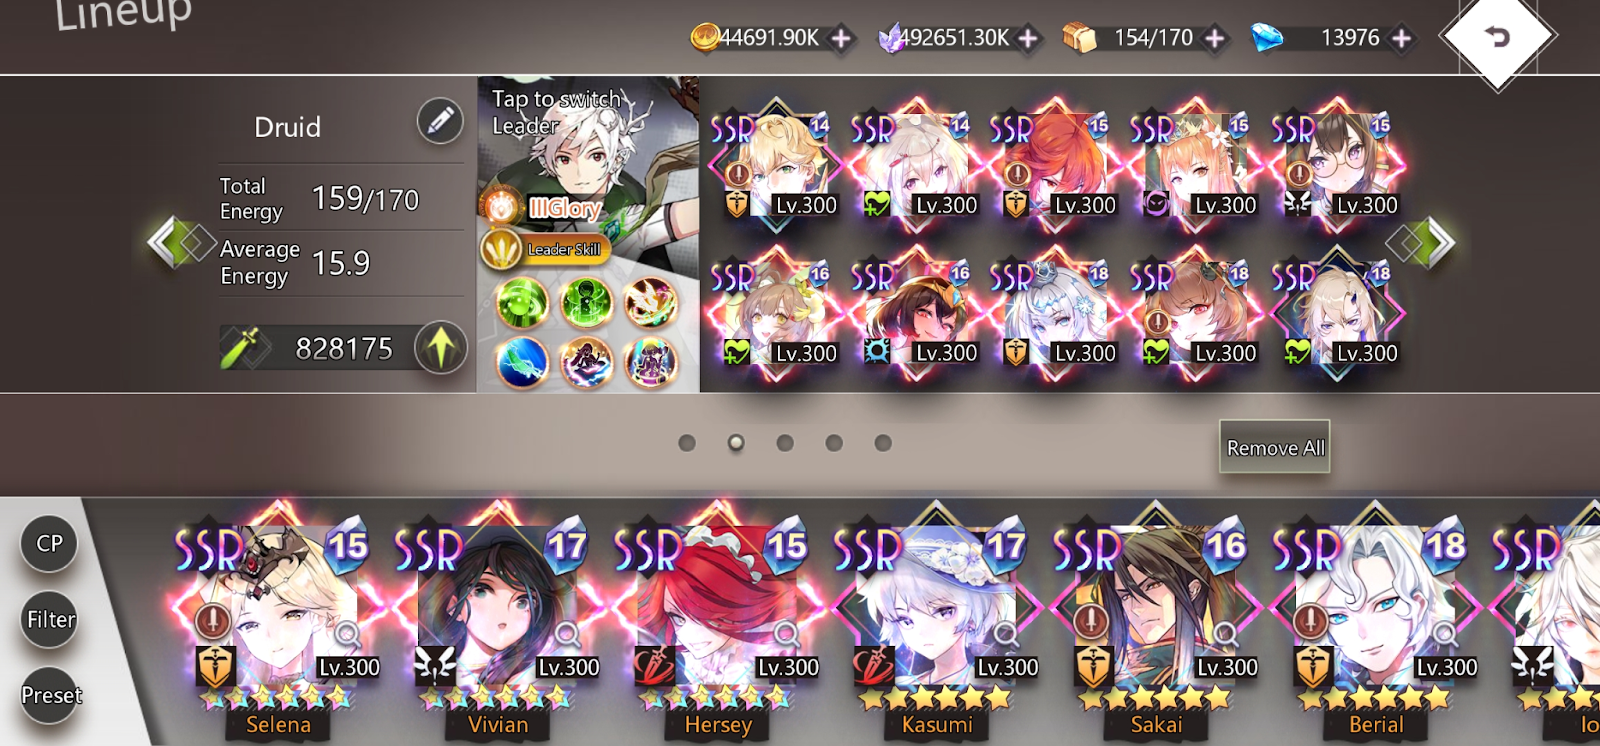
You will now ask, how can we guarantee the full HP at the end of the match? One answer is potent healing units like Ming, Anna and most importantly Diana, but those can be countered to a good extent by Fenebeths, so there is a huge secondary component: the aforementioned Grant. An interesting interaction with Grant and Druid passive skills is that together they make the column Grant is in take literally 0 aoe damage (no numbers pop up from AoE attacks, LITERALLY 0 damage), making it really hard for teams to access your leader, making stalling really easy. An early Grant into another unit in front of him means that both him and your leader will be immune to damage, unless the enemy has a way to access your leader with a unit like Haruka or the Axe leader’s second skill. This makes you not have much to worry about, since you can pillowfort behind some shields from Kiraya, and some Heals from Anna to make it really easy to run out the clock. An example CP setup looks like this:
The aim for that kind of setup is to place Grant in front of your leader, always keep high hp with Grant mitigating any damage. You can pressure them with Kiraya and Miyuki in the first 40 seconds of Druid healing your units for free, making them either have to defend themselves with units, or waste 40 seconds where you get some good damage in at 0 cost to you. Last minute, the easiest way to win is to play Fenebeth and try to keep her Curse up until the timer ends so that the enemy cannot cheese you with Diana getting them to full HP (if you are not sure you have more CP).
Shield-stall
If that is the case (you have average CP, higher than Hunters or some stall players, but lower than others), remember you need to be higher HP percentage than the enemy to win, so if you are max and they cannot damage you, even the littlest of damage will give you the win. If the CP plan fails, the team itself can fall back to cheesing your enemy into a win: You can go Fenebeth into Jason to make them lose life with curse into forced healing from Jason.
Even if they have Grant, this will bring their HP down since it is not aoe damage for Grant to mitigate. This can only be stopped by having a shield up, because most likely the shield will absorb the curse damage.
This brings me to my next point. Shields are the most powerful tool you can deploy alongside Grant. With many units/methods of dealing minor single damage to your leader that Grant cannot mitigate (like the one stated above), a shield will save you the hustle of having to heal. Which sounds fun since this is a heavy healer team, but everyone is playing for Fene during the last minute, making healing kind of a hard job. For this reason Kiraya is godsend, items such as Divine Crystal might save your butt, Anna shielding is really powerful too. Just be sure to bait a Kasumi/Elena in between multiple shields, since at the moment they are the only answers to you getting a big shield up (by stealing/cleansing it).
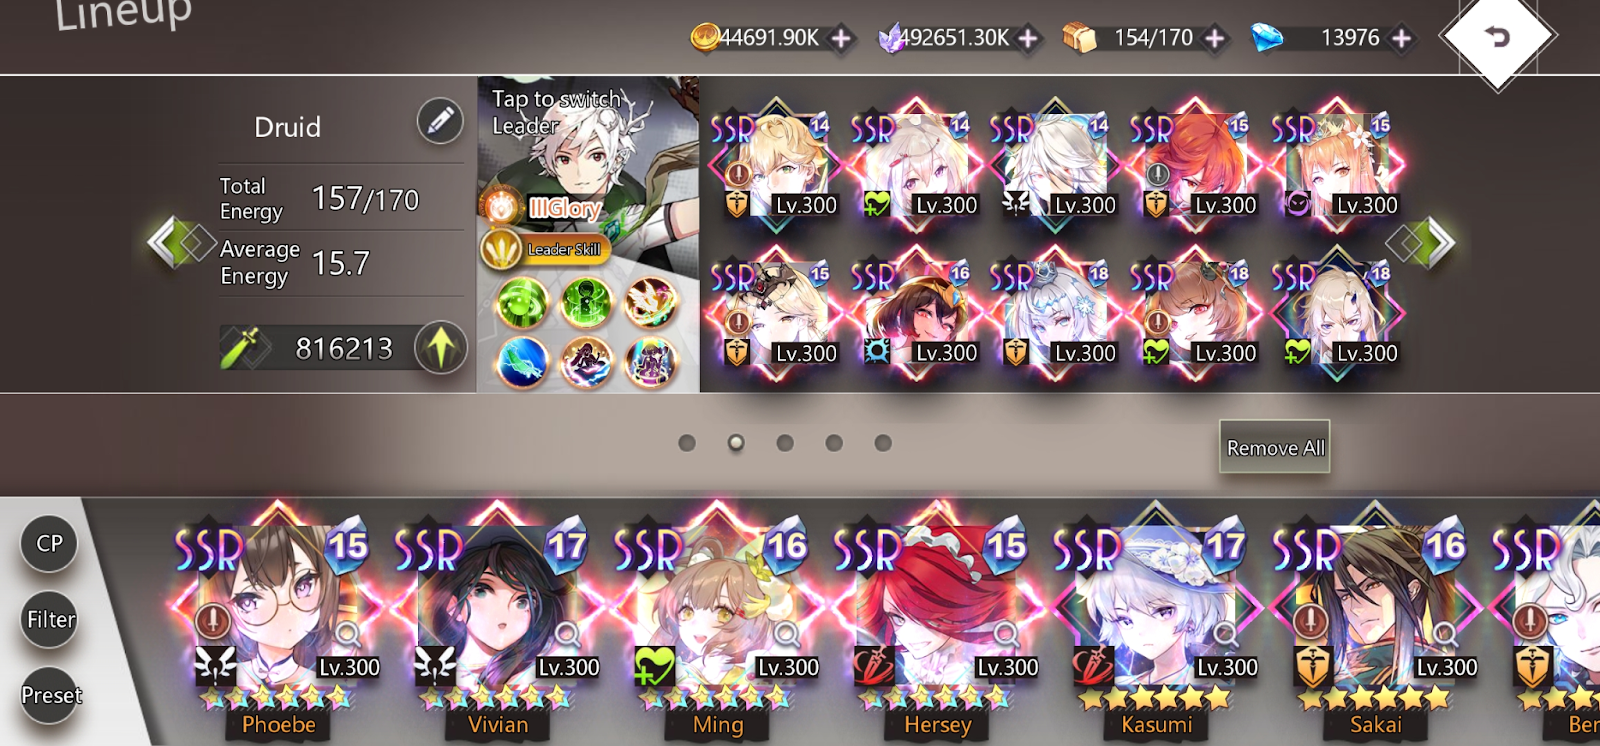
In this regard, Selena is excellent if you want to include her, since every unit you drop will generate a potent shield on your leader at no extra cost. This way you can withstand both damage from a Maki passive, or a last second Kichou. Haruka is a big stall breaker so be wary. She can break most shields on the leader with her huge damage, so in between her 3 attacks be sure to space out units if you are using Selena to absorb her damage. Angela is a good counter to that as well, taunting single damage attacks to her instead of your leader. I was running a Selena lineup before my current one and it looked something like this.
Low-CP Cheese
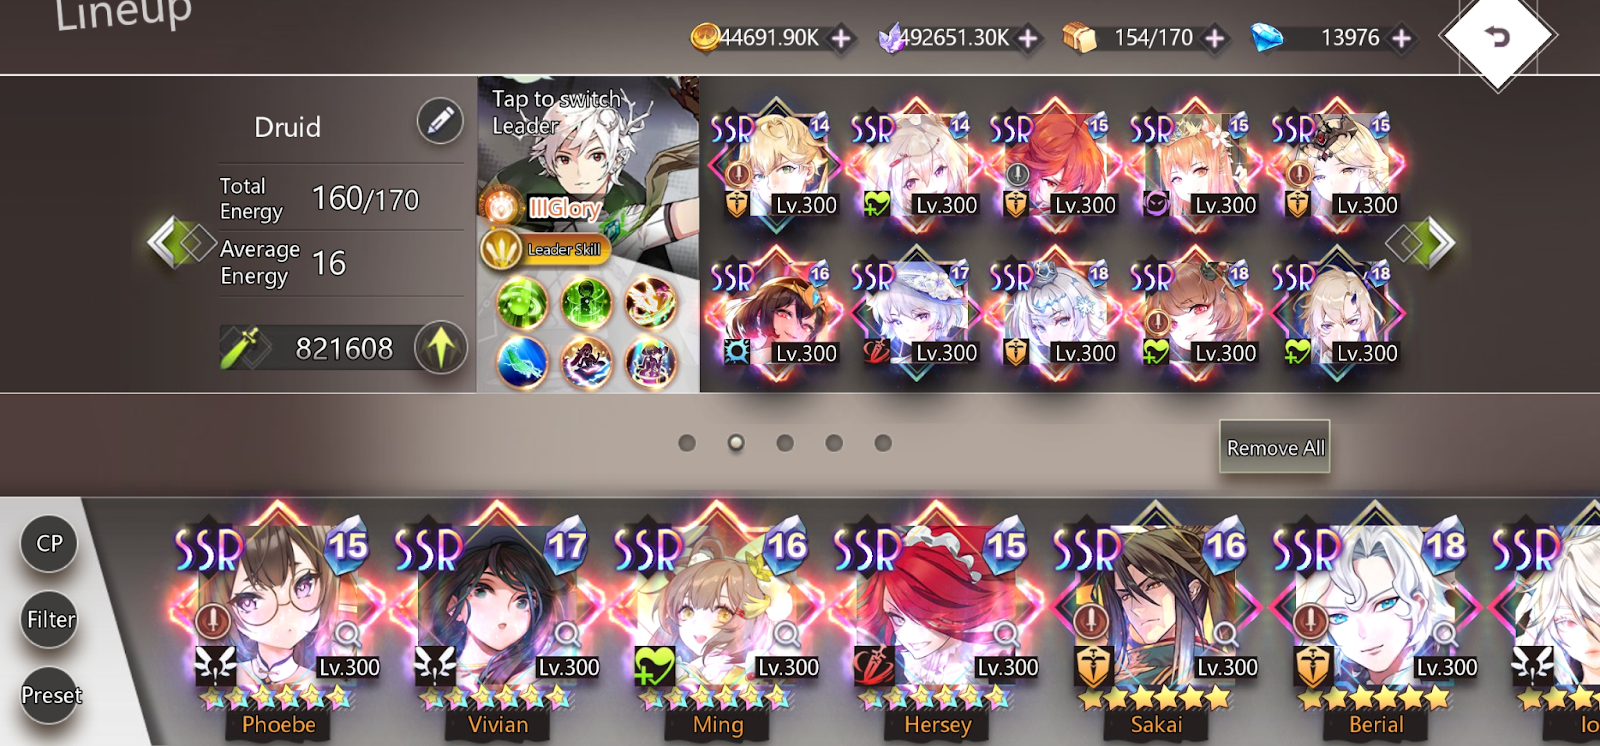
Lastly, if you tend to face a lot of mirror matches and the enemies always have more CP than you, you need to adjust accordingly. This version gives up some defensive elements in order to have the opportunity of “cheesing” your enemy at the last minute. The team looks something like this (you can replaceKasumi with Elena, depends on what you prefer in that slot):
As I said, shields can be your best friend when playing Grant and Druid, but this holds true for your opponents too. If people play the same way as you, you might need to up your cheese to have better chances against that matchup (apart from the obvious Jason-Fene). Kasumi and Elena are the only units as of now that can dispel all shields on the leader. If the leader is shielded and behind a Grant, you cannot damage them with a standard druid lineup, since the shield will absorb the minimal Curse into Jason damage. This is where Kasumi comes in, dispelling the enemy shields so that Fene into Jason can work. You want to sequence it so that you curse them with Fene, build up energy for both Kasumi and Jason (caps at 30, but by the time Kasumi does her unique, you will have gained 4 energy) in quick succession so that your opponent doesn't have any time to build up a shield again. This way you can cheese them to win the game, since you will hopefully be at max HP and they will be at 99%, even if they have a lot more CP than you.
On paper this would be the best version of the deck, but when playing it, it is also the most inconsistent. Since you are running about 5 units you don't want in your opening hand (Angela is a bit wasted early, never place Diana earlier than last sec if not 100% needed, and Jason Kasumi Fene are needed for last minute cheese) meaning you will either have to cycle through your units until you stabilize or you find your defensive setup, or you will get a hand of all the cheese units at one place. Just to clarify, cheesing and anti-cheesing can be layered. We adapted to the stall mirror having shield by using Kasumi to steal them. They can adapt to her by using Selena to instantly and easily regain a shield. We can then add another layer to our cheesing by adding a unit like Haruka in order to damage the lowly Selena shield and pull once again ahead. This continues forever, since you can put more units in the team to specifically counter their newest addition, but as I said, this leads to very inconsistent hands (not only the opening 4). For me, I tend to enjoy the more consistent versions, the 2 first ones.
Some other units you can consider for all versions are Ming, Elena and Rikia, all with their pros and cons. Ming dispels 1 debuff from each unit on board (Leader included), meaning she might fail to cleanse the curse of a Fene and cleanse an atk reduction for a certain unit instead, so she needs to be played with caution: either you need to keep a count on your head about what debuffs your leader has and how many rounds they still persist, or pair with another cleanser. Rikia is more safe, since she cleanses all debuffs, so you can safely Rikia into Diana at any point you need. However, if you got a full board and the enemy Fenebeth is still alive, Rikia gets a huge damage boost from the multiple debuffs cleansed to the point that she kills the enemy Fene, only to reapply her curse as she dies, returning to the same point you were. Lastly, Elena is the most recent addition, but she brings the best of both worlds: she heals 2 debuffs which is not as consistent as Rikia but more than likely does the job unlike Ming which is always a roll. She also has low damage, so she doesn’t easily kill enemy Fenebeths. And even if she does, she is great when paired with Ming, since you will have just the lastly applied curse for Ming to cleanse and start healing you back up. Stripping enemies of buffs means she can be used like Kasumi for cheesing, but again not as consistent as Kasumi. She is pretty versatile and a fine addition.
Matchups
Hunter
Hunter is the best matchup for you, since they effectively have 40 seconds of not doing anything. In that time you want to dig for Grant (always in front of leader, always middle row) and Kiraya, Selena, Anna, or Phoebe in front to protect him from single target damage. You can even pressure them a lot that first minute with Ion and Kiraya. Most Druid lineups can bring hunters to about 50% in those 40 seconds of inertia. Even then, just aim to trade shields for units, slow ball your Miyuki so you can kill multiple units etc. Unless they run Diana, you can easily end up with more HP at the end of the match. Things to keep in mind: Kasumi can strip your shields, be sure to not load up with all of them simultaneously (easier to do with Selena), but other than that, she cannot damage you or most of your units due to Grant negating crits. Haruka is their best unit, any of her uniques can pop even a big Kiraya shield. Try to sustain it with Selena passive shields in between her casts, or blank her last second unique by deploying Angela taunting her. Keep a cleanser and a healer for the last seconds, so you can guarantee a higher life total even through their cheese.
Axe
A good matchup overall. You need to start off with a Miyuki or Jason. Since they can immediately get max rage with a Rubi first drop, don’t wait even a single second before playing them, deploy them immediately if you have them first hand. If you don't find them in your opening hand, deploy safe cards like Anna just to dig for them before they get more than 1 stack up. From there, Kiraya is the mvp of the match, lowering their rage generation with her passive, shielding your leader to absorb 1 of their charged 2nd Skills. If you open Kiraya but no Jason Miyuki, wait for them to get their first stack and use her afterwards to make their second stack really hard to get. Try to either loop her and keep Miyuki alive. And during the last 40 seconds, an Angela on the bottom lane on a full board can make the axe miss almost all of her skills. If you have whalepins on your units, put them all in the Angela column so that when Axe kills Angela she kills all of them, giving a chance for all your pins to trigger simultaneously.
Things to keep in mind: there are 2 types of axe players most of the time, combo players and stall players. Combo players use Astaroth and Rubi recycling to build up rage, but this is your best matchups of the 2. Between the 3 rage control units (Miyuki Jason Kiraya) you can keep them low overall. Also, a good fene when their Asta is about to die will literally obliterate them life wise since Asta heals for a percentage of the leader's HP. The stall Axes try to imitate a stall team, losing some of their leader buffs in order to play more defensive units to stall out the clock, so play it out like any other stall matchup. Rage control early and just play for the last minute cheese from there. You are the de facto stall team, you should be better than them at stalling
Mirror match (Druid/Pala Stall)
This is the hardest matchup. It literally comes down to either cheese or CP. You want to play for the last minute Fene into Kasumi into Jason (you should keep that order as demonstrated above, if you drop Kasumi before Fene, they have plenty of time to get back their shields, while Fene’s curse last 2 turns which is enough time to get the Kasumi Jason follow up). Don't bother killing their units unless necessary, a full board helps stall out the clock more. There are counters and picks for both cheese and anti-cheese, but they are more in depth and they make the deck more inconsistent.
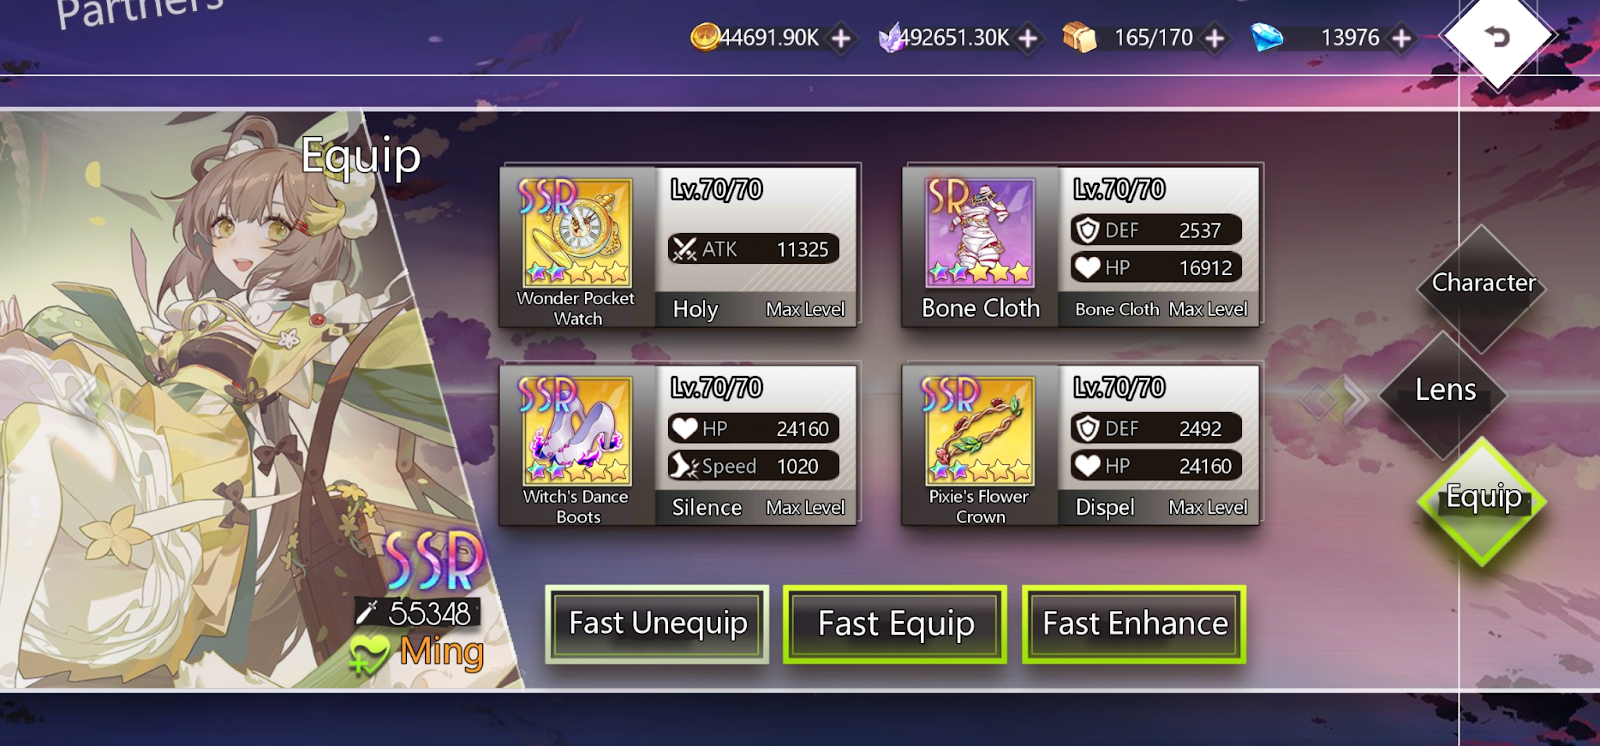
Unit builds
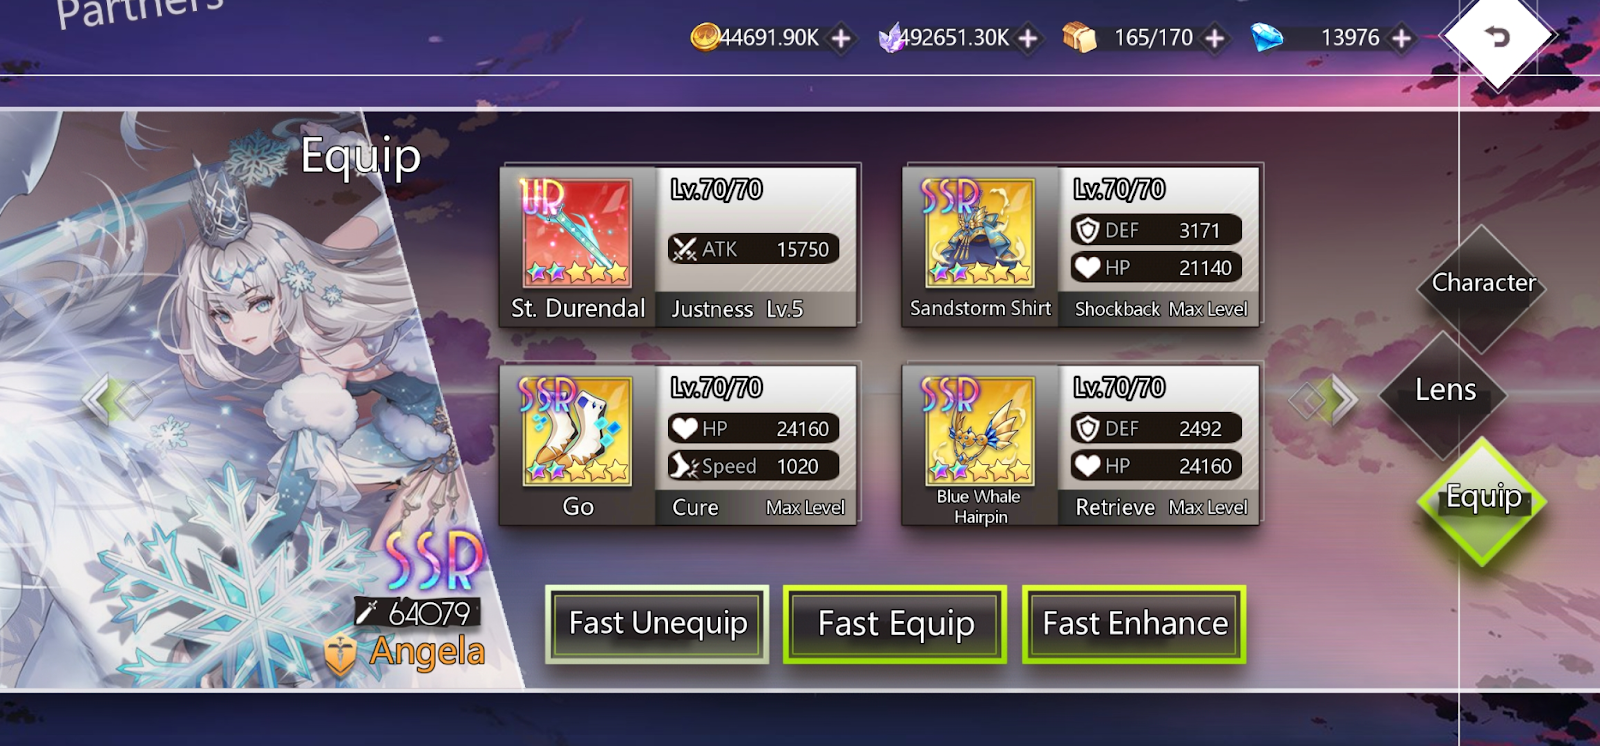
Angela is pretty straightforward. Durendal for invincibility. For armor either Sandstorm or Scale Mantle since she is taunting the board. Go boots are good on her because she heals even in her taunt state (not attacking on her turn still counts as an action for Go). You can always go for Pegasus UR too. Whalepin on her not for value (like some old Reaper setups were using her), but as a checkmate vs Axe. If they trigger it by killing her with a few seconds on the clock, you are guaranteed that they will never hit you.
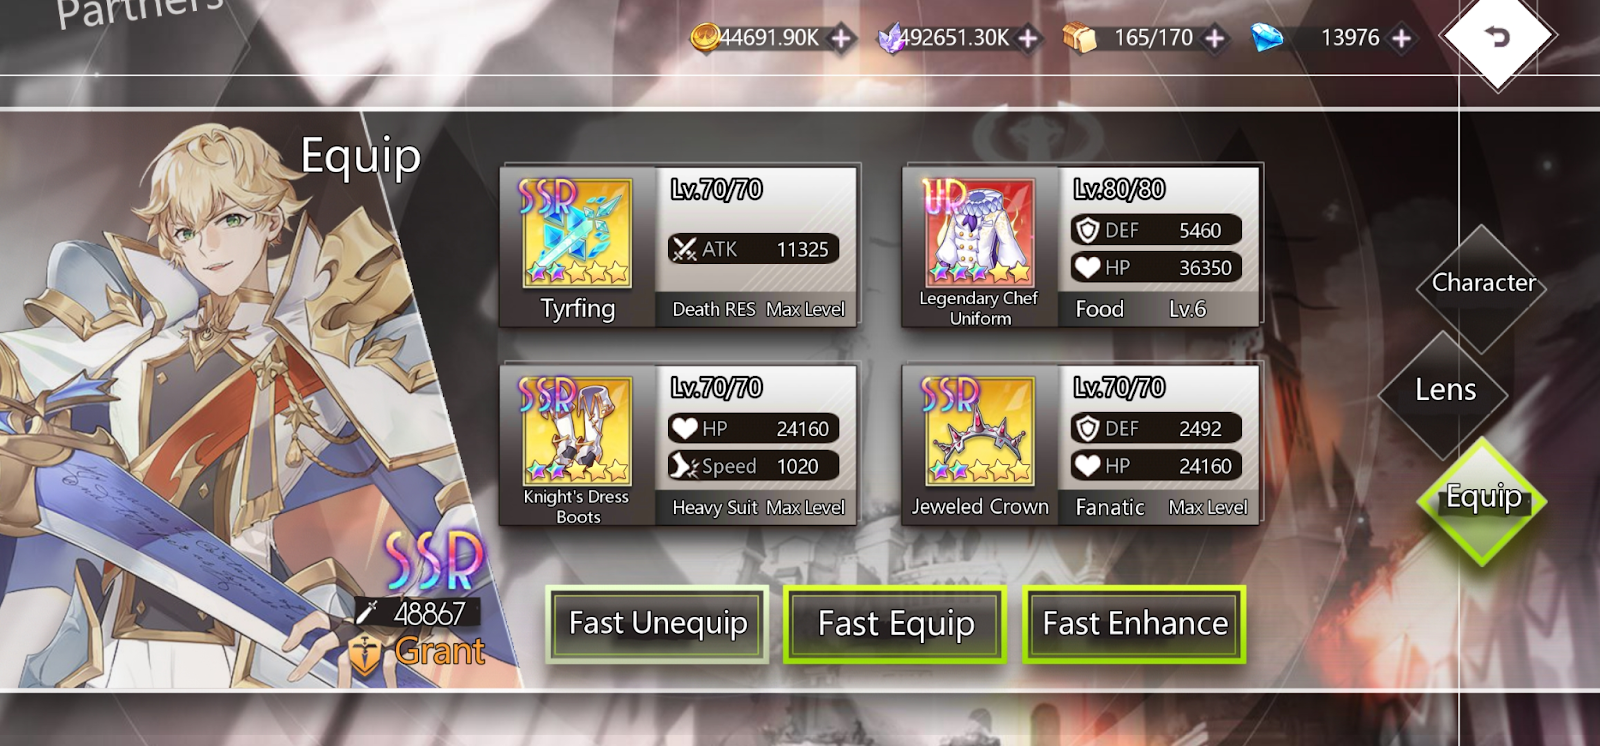
For Grant I use a standard Block build, mostly because I don't have another Guardian that can fit it all. If you are not using at least 3 of the 4 block gears, then a block build is not worth it imo (same reason I don't use Block Boots on Angela). Most important thing is that he survives most stuff. Tyrfing is a must, it is the best failsafe you can give him, since blocking is not guaranteed. Healing back up if damaged while building his shield is nice with the accessory too, and this one survives Seeger pretty easily (I had a seeger recycled 3 times in succession and Grant couldn't die because of the shield letting him survives her first passive, the tyrfing the second one, and another full shield and some heals helped him sustain the 3 as well).
Another approach for Grant is to max out his HP as much as possible, because more max HP means more raw shield per second, so dressing him with Tyrfing and 3 URs is good. I will be trying this with Beginner Armor, Sakura Necklace, and probably the Mousepad or the eventual Beginner Shoes.
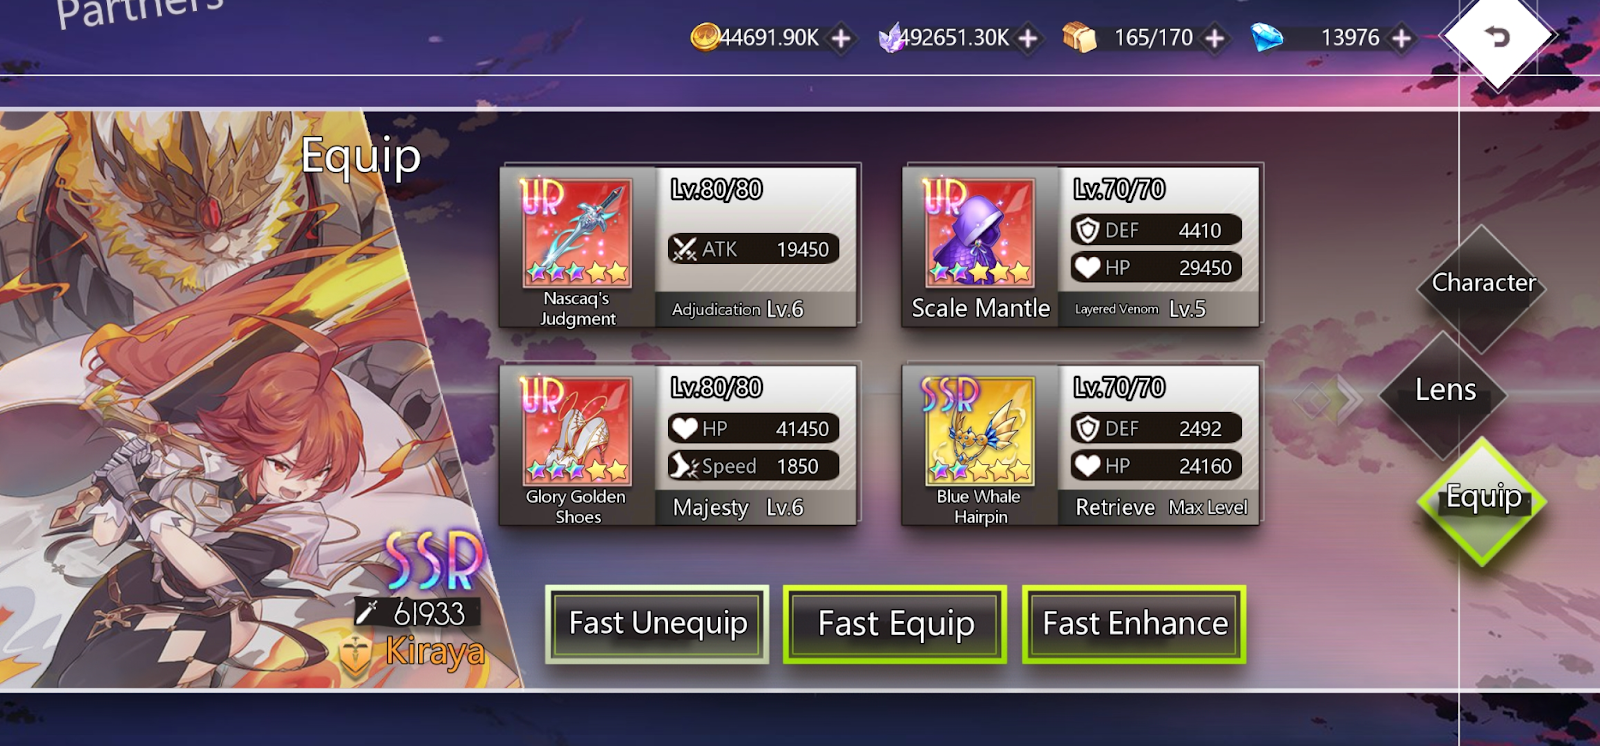
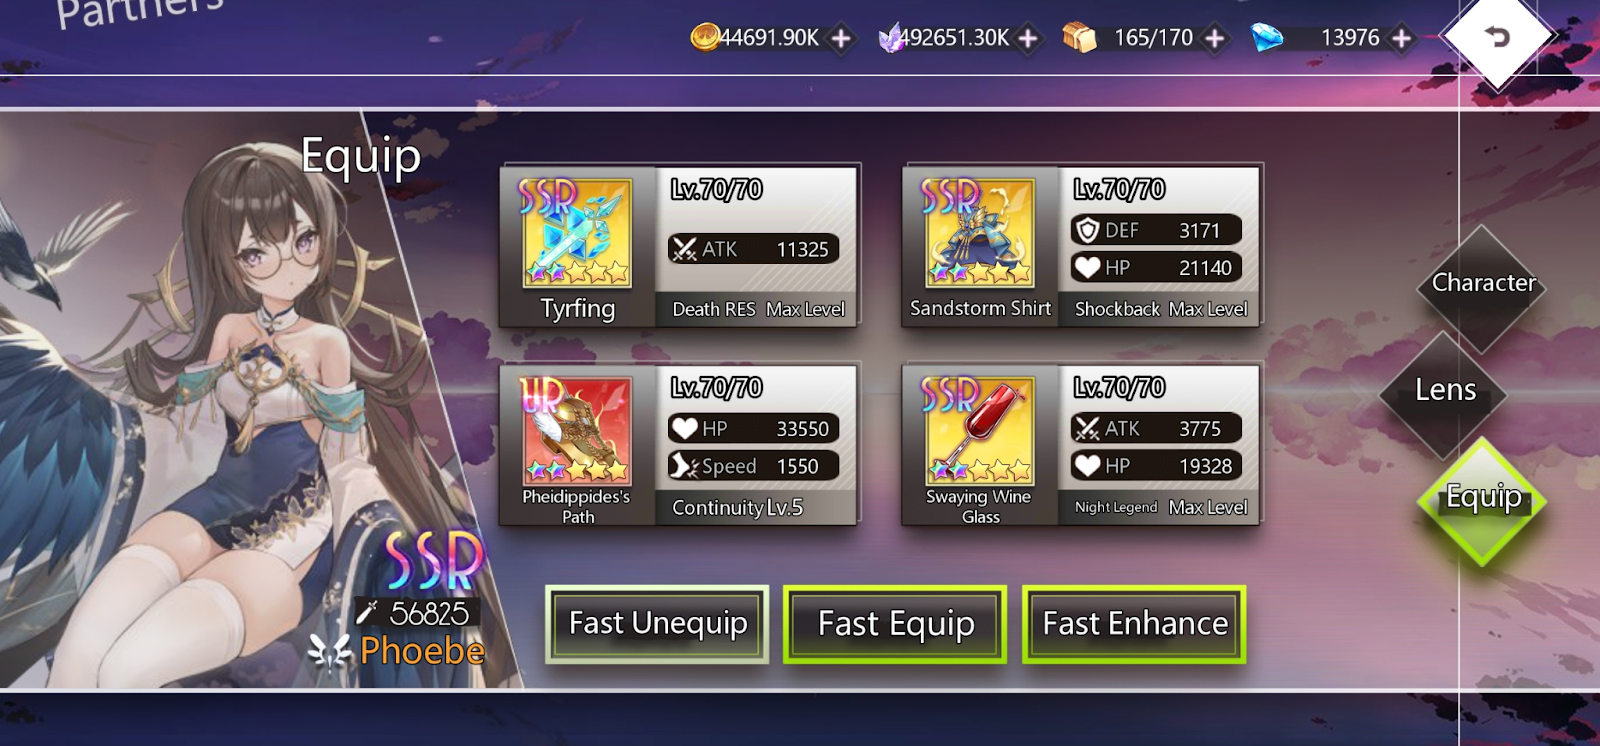
Kiraya is my personal favorite unit in the team by a mile. Obviously her UR makes her really really good. You always front line her in front of Grant to keep him alive. He makes her take 0 AoE and her URs saves her from attackers’ single target damage. Even Kasumi stealing the shield won't kill her due to Grant. The boots are perfect for her, she deals tons of damage in the middle lane alongside the huge flat attack stat from the UR, killing other Kirayas in long trades and 3-4 shotting Grants depending on the build. Scale mantle isn't ideal on her (as the uniques need to break her shield to trigger the curse), but the damage resist it gives is more than welcomed (TShirt is a good alternative, other than that Sandstorm would be really good). I am waiting for some datamined Armor to give her instead that has synergy with Shields. Whalepin is a must on her imo, she is the key vs Axe as stated above. Placing her mid means you mitigate a 2nd skill from Axe. Her passive is detrimental to Axe since the rage regen keeps them at bay, meaning if they kill her and trigger the pin you get both more time and another 2nd skill damage mitigation. If they kill her in quick succession and you get 2 Kiraya passives going (for example if she dies instantly when she comes in by a 2nd Axe skill and whalepin triggers or jason brings her back) her passive stacks with the last iteration of it, making them gain literally 0 rage for the duration. A good alternative for the UR would be the Miyuki Cat weapon Fortune Caller in order to make her rage control the middle lane keeping the leader more at bay if she connects. Sakura necklace isn't really ideal on her (especially compared to Whalepin) since it last only for 2 rounds, and more than likely they cannot penetrate her normal shield she gave to Grant and the Leader regardless. Unless they use Kasumi of course, making it irrelevant regardless.
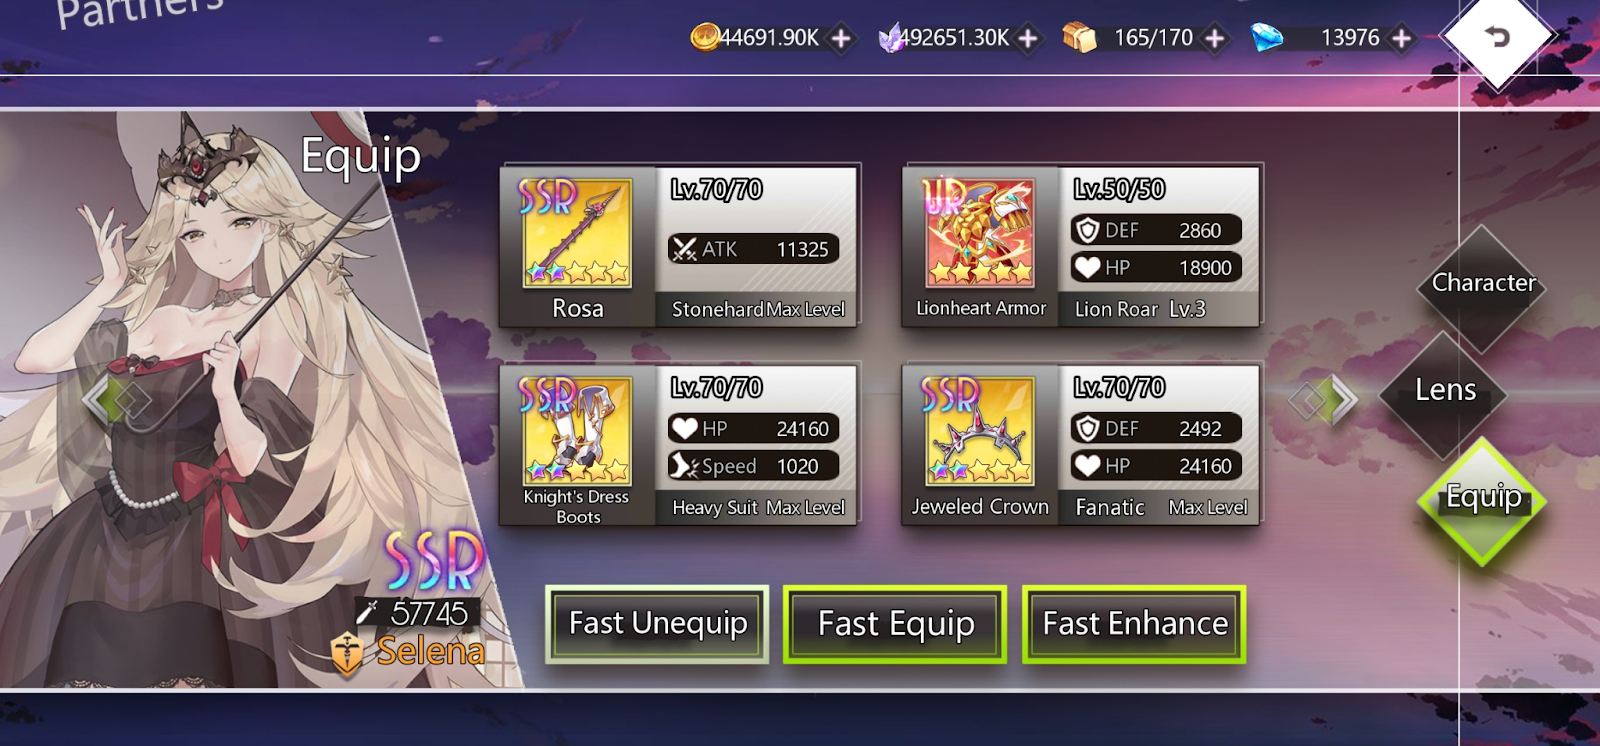
My Selena when I use her takes whatever gear is left since she has survivability regardless and we only need her passive. She can hold Sakura Necklace effectively since she boosts her own HP when entering. This simple build is just to convey that she is super filler.
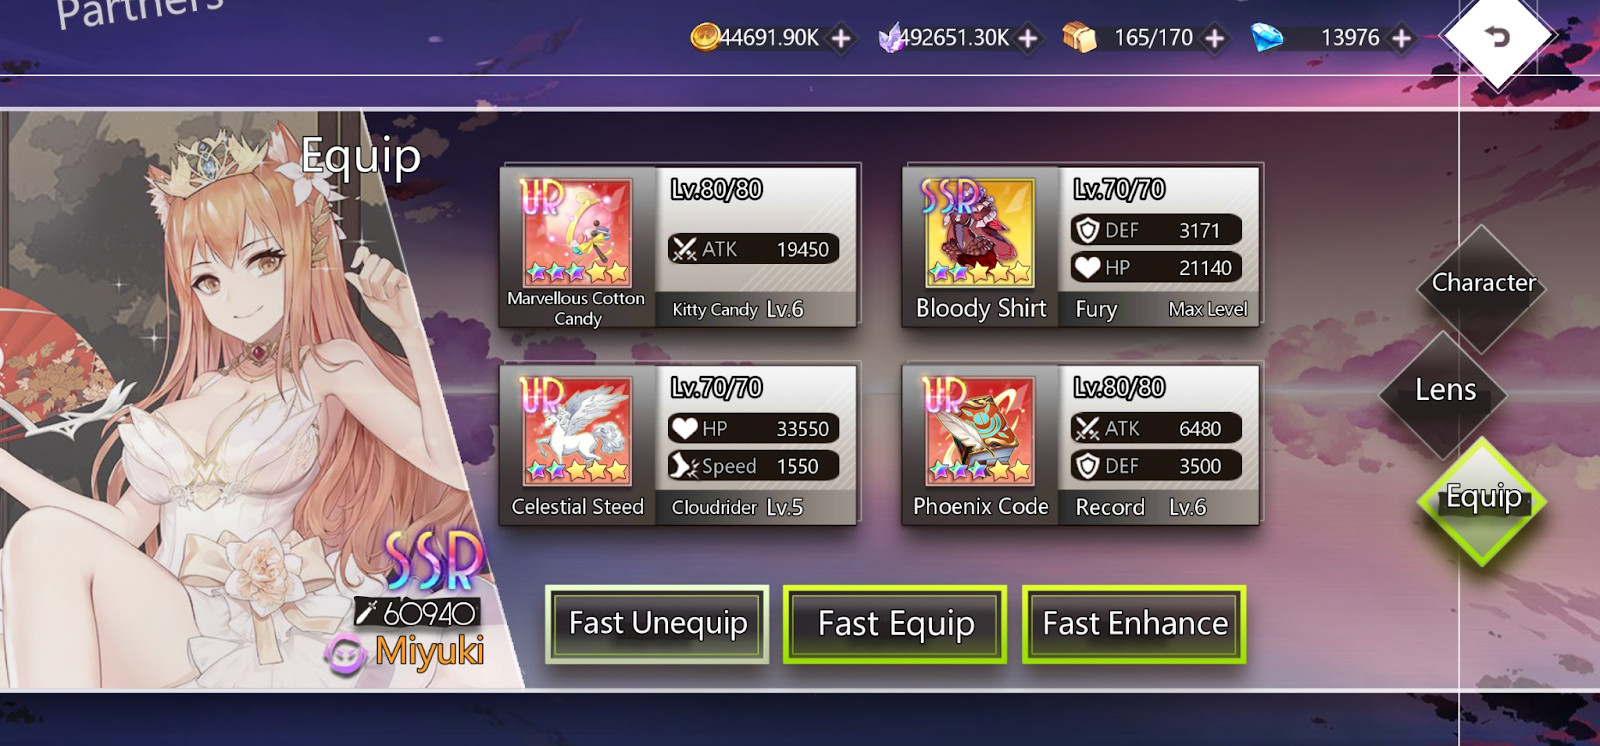
Miyuki is a kinda standard UR mess. Cotton and Code are best in slot. The Bloody Shirt is good for when you face an enemy Miyuki on the same lane, in order to break parity and gain rage faster than her. The pegasus boots help her sustain in the off lane, making her insanely tanky paired with the leader's AoE damage resist. You can use Mousepad instead for the damage for shoes, or another UR Armor for more survivability in place of Shirt.
Phoebe is kinda standard as well, no reason to use whalepin as she most often than not will not die. Frontline her when you use her. She is not a main unit like in Sorc comps since you have huge survivability regardless. This is a good sustain build, and since she or Miyuki will take most kills when they can, Pheidippides Path is good on her. Don't be afraid to drop her for little to no value, she isn't as stellar in these builds since they don't aim at recycling her (also she doesn't die as easily to be honest, so you CAN'T recycle her without Diamond). Her Defense Down debuff on her Unique helps vs some enemy Mings as well. Paired with Miyuki reducing damage res with code, and Fene curse, it is a 2/3 chance they fail the cleanse.
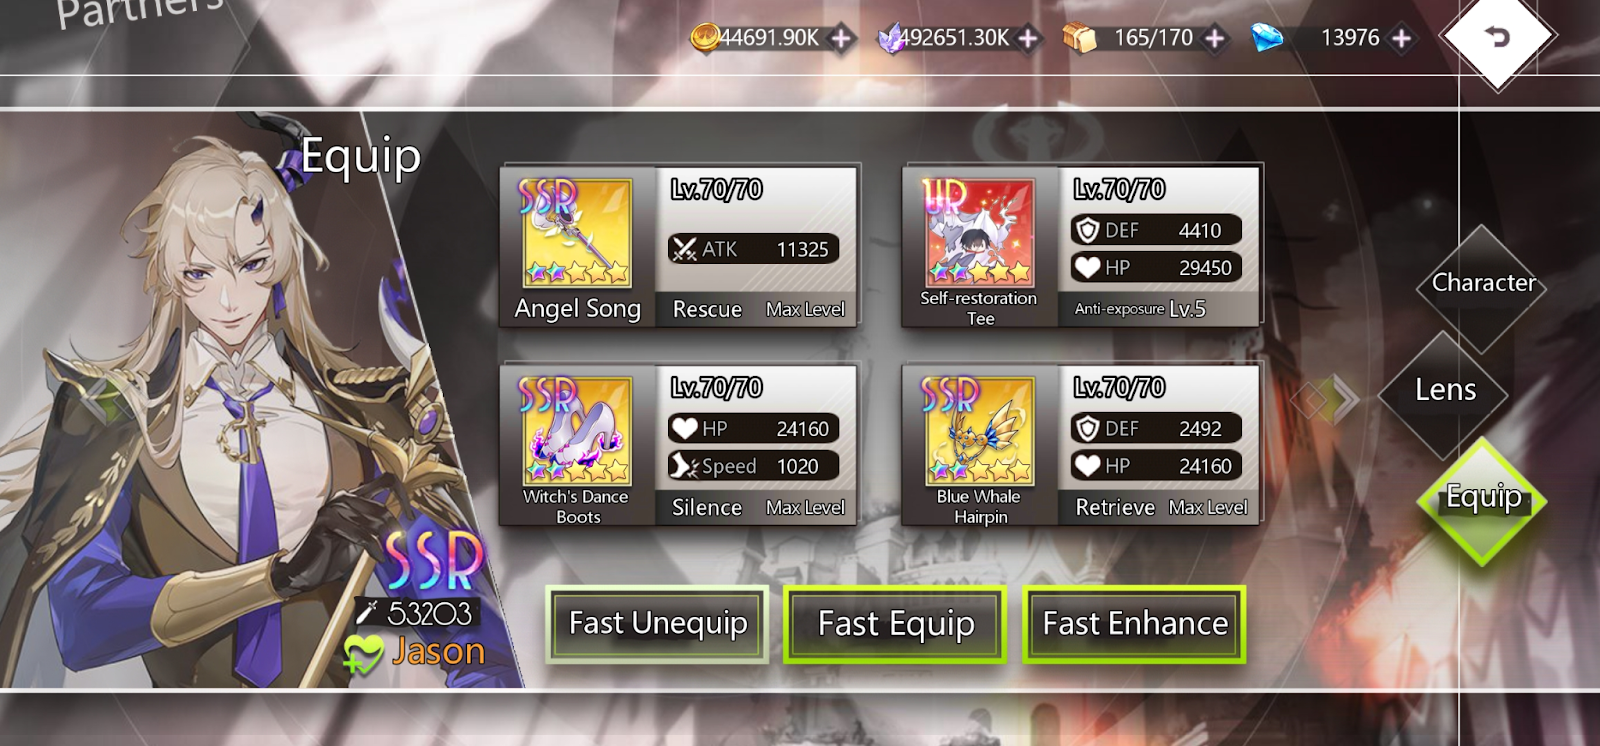
Jason is the best unit to hold the Tshirt, since he always comes with a unit on baoad, so no chance for him to die alone. Angel Song over stopwatch in order to heal the unit he brings back to full with a single auto attack. I use silence boots on all units they can get them, really help most matchups, especially vs axe. Whalepin Jason is pretty much a fail safe to any game going wrong. Try to use him to cycle Fene and Miyuki mainly, and keep in mind that if he would recycle a guardian, he will bring them on the middle lane.
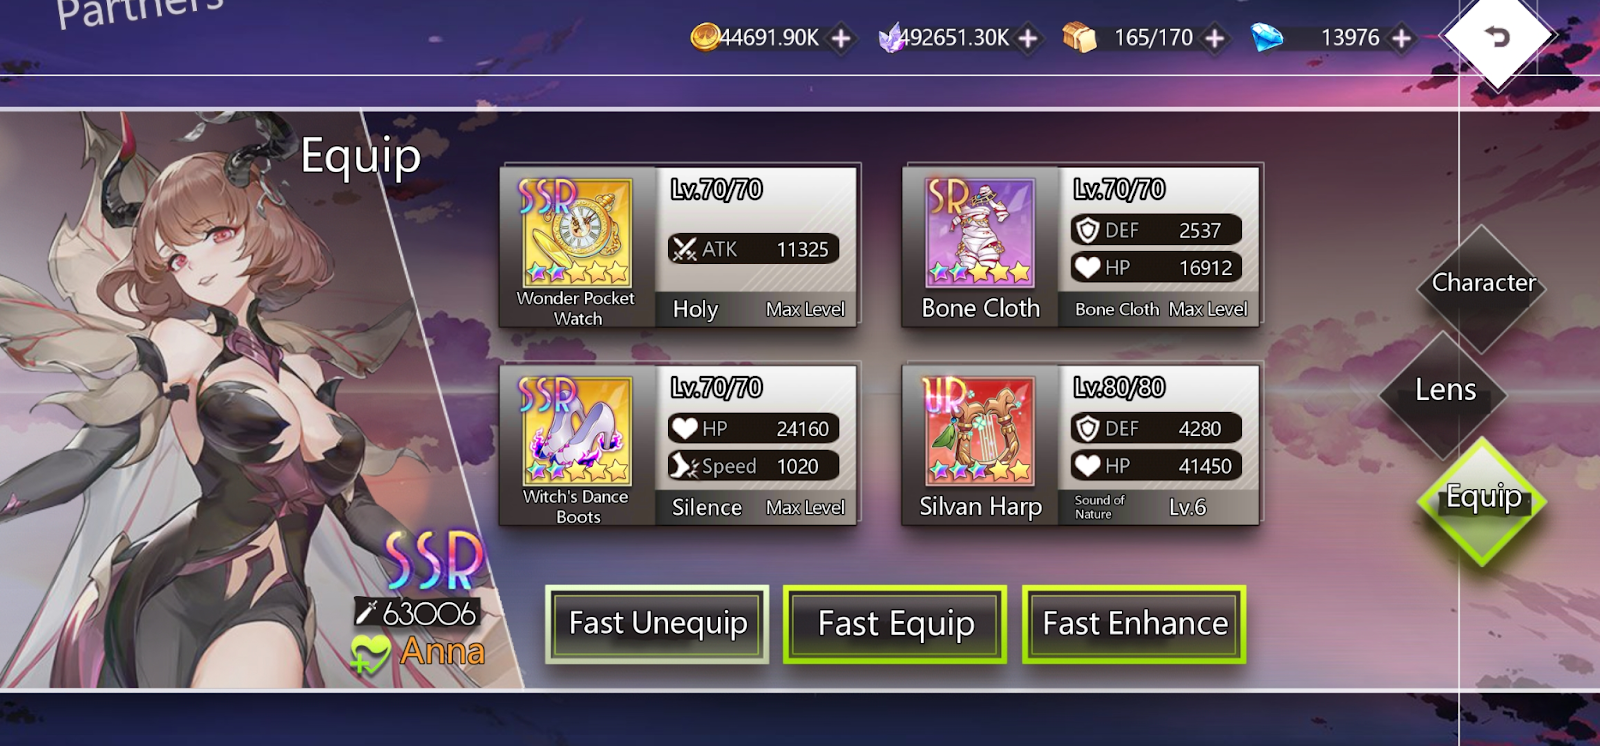
Anna is similar. Stopwatch is best for all healers other than Jason. Bone Cloth on healers is essentially a free TShirt, Silence boots are bonkers, and she is the best to hold the healing UR due to making her have more base HP thus making her shield bigger, (also survives the most out of any healer).
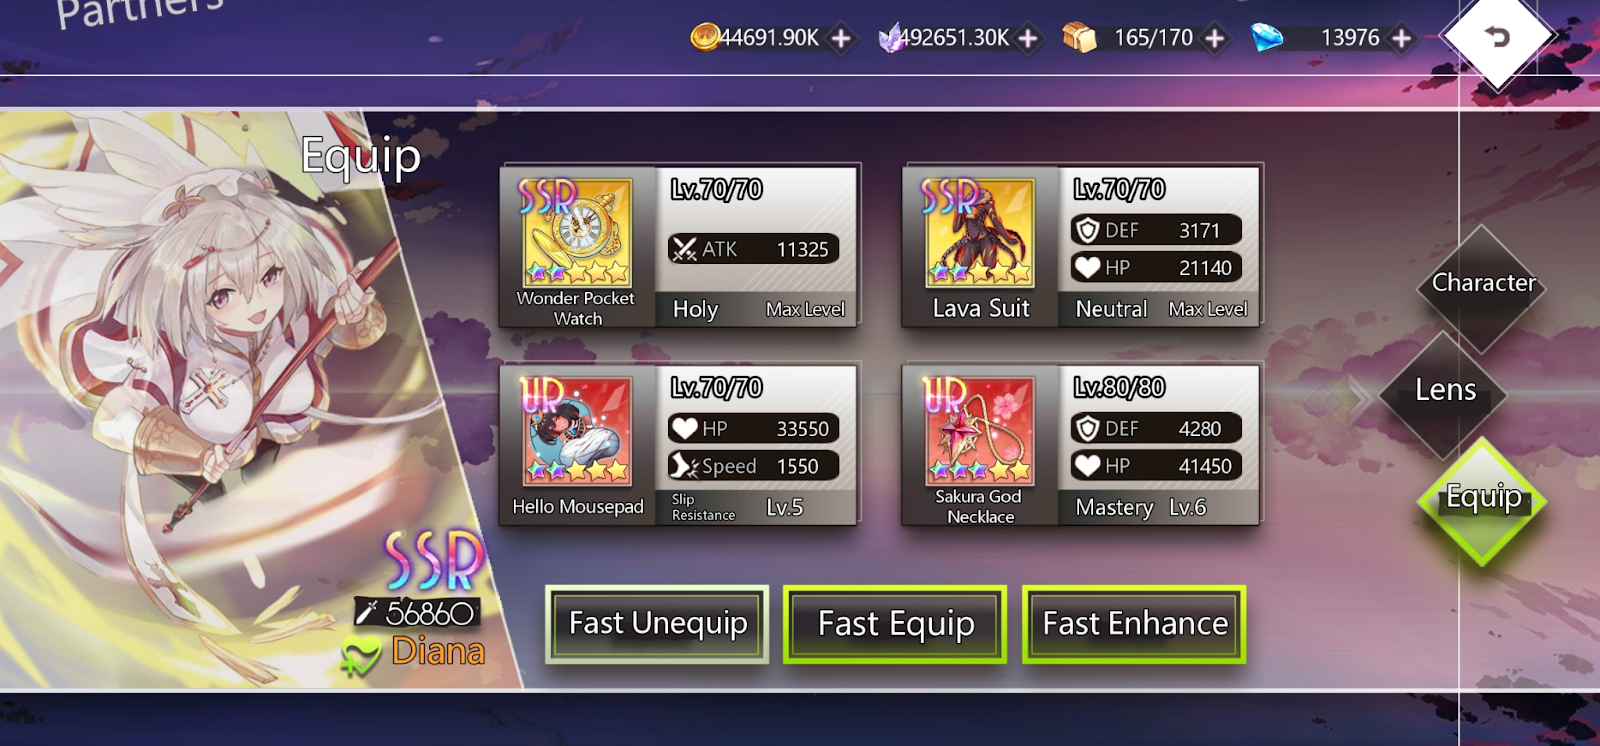
Diana just holds whatever is left just for CP boosting purposes. Will probably move the URs around to better users. If you have whalepins to spare, you can use one on her, but I almost never use her midgame (so she is unlikely to die thus whalepin is kinda wasted). I prefer to save her only for last seconds, because it is too risky to just drop her and lose access to her. You can heal up with other Healers regardless, so no need to risk losing access to your massive game winning heal. If you have extra silence boots after giving them to everyone else, of course she likes them, but as I said, she shouldn’t be on board unless you had to cycle through your hand to get to other units.
Ming is a very recent addition to the class. People were saying that her random cleanse hurts more than it helps which isn't really true, it only hurts if you play her last second. Having access to Elena into Ming is really good because the kinda guarantee that the heal train will keep on going. Playing Anna early enough (at least 2 minutes on the clock) baiting an enemy Fene only to play Ming is really good. Even if they reapply the curse, Anna and Ming act as rage batteries, Anna heals so much bringing most people without shield down to 1 HP, giving them tons of rage to ult again, which triggers Ming using her skill, cleansing the new curse, and letting Anna heal again for a massive amount. She is nice overall. Standard Stopwatch Bonecloth Dance Boots. Pixie Crown is synergistic with her kit, not a must at all though. You could run Whalepin instead just for some weird lategame scenarios.
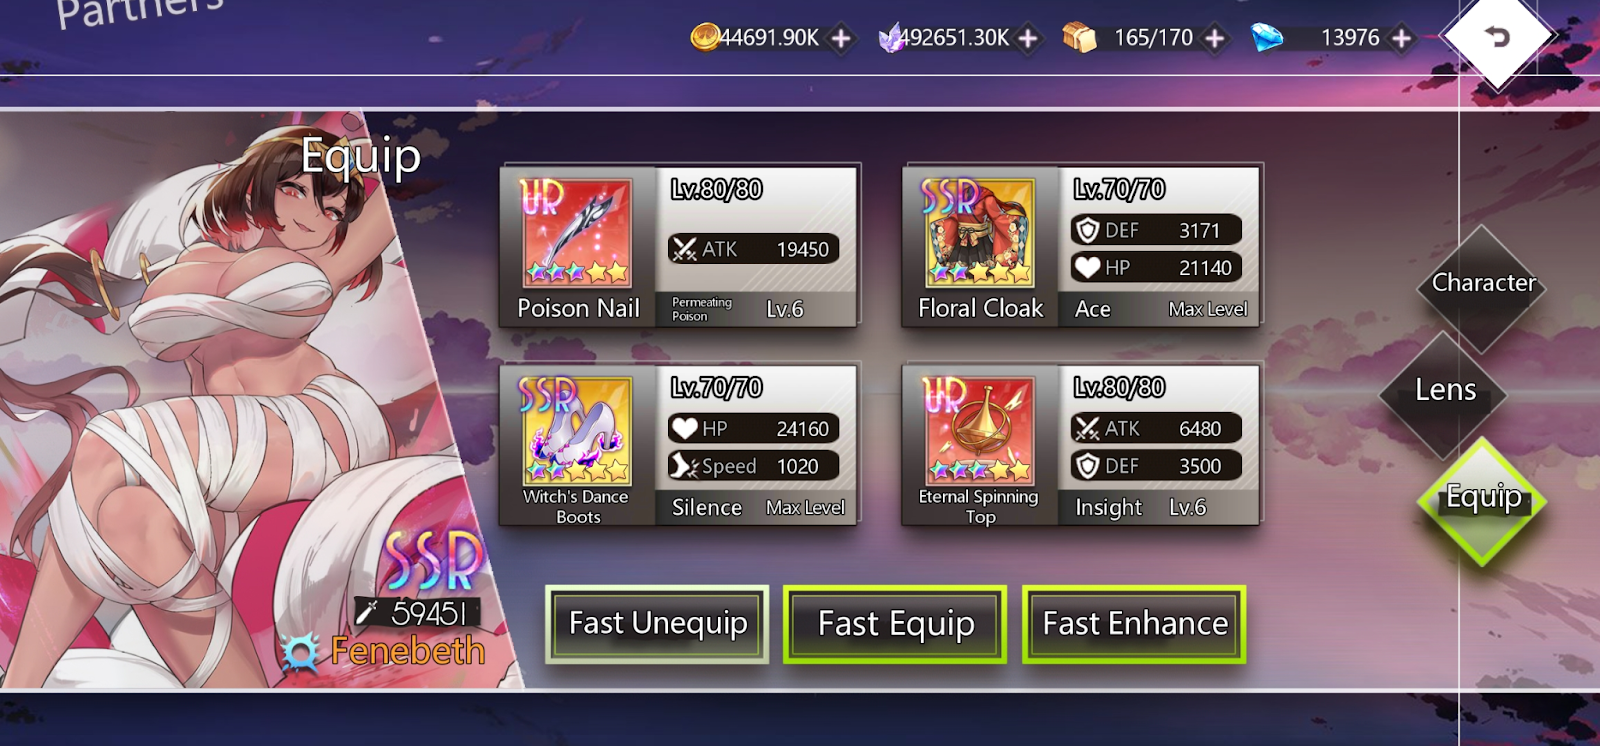
Fene is probably the best unit in the game right now, all of the PVP revolves around her and Diana. Nail is super powerful of course in the stall mirror, thus some armor to maximize survivability or Bloody Shirt to make her unique again is pretty good. Dance Boots are probably best in slot for all sorcs, though Crimson Legboots are pretty good on her giving her attack reduction, helping vs Ming users. Actually, if you don't have Nail, a build of Lance of Ascalon and Crimson Longboots would be really interesting in general since she will give 3 debuffs including curse, making it a nightmare for Ming to cleanse. Another powerful weapon choice on her is Cursed Swords, helping with rage controlling Axe by being the fourth rage reduction unit you can run. I use Spinning top on her for the extra flat attack and defense penetration in case opponent's have shields but not Grant in the middle lane, as she helps break through them pretty easily this way(as well as CP boost). Whalepin is super good on her as well of course.
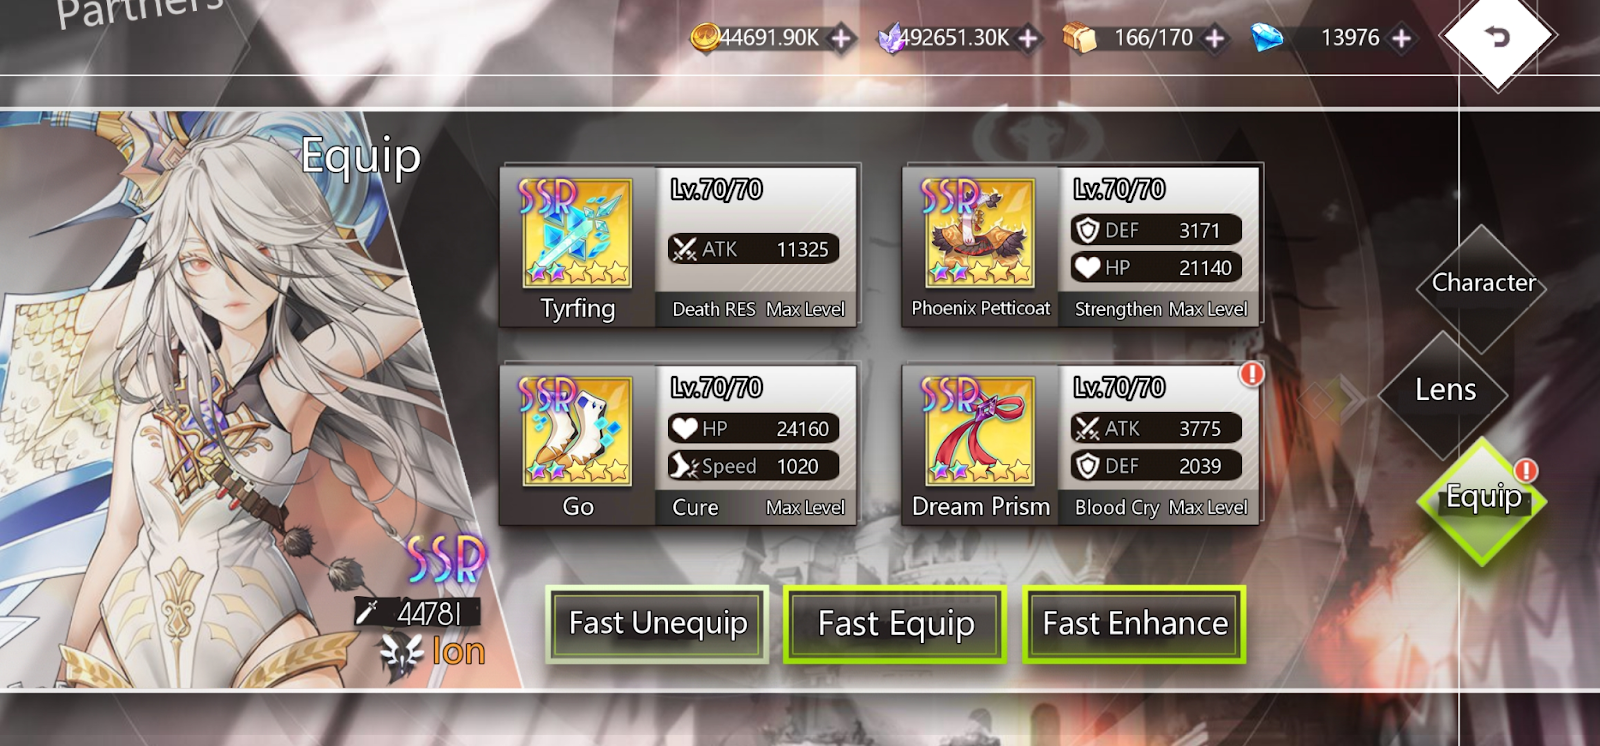
Lastly, Ion gets an honorable mention since she is incredible but in a weird spot in a stall build. She is the best at killing 1 unit at a time, and a really early Ion can kill multiple units over the course of the game. Tyrfing is the best weapon for survivability, Petticoat has great synergy with it since after surviving the KO, you are in range for the extra protection from it to trigger. Go boots are probably BiS, and Dream Prism makes her great at killing most units with her true damage, use Bloody belt if you don't have one lying around.
I will also screenshot Rikia and Elena, but need to test more with Elena first.
Positioning and General Tips
A general concept that you need to keep in mind is that a full board from both sides is really helpful to you, as it makes rounds take longer, and round-based effects do the same as well In order to maximize this concept we do the following little trick Assuming from to to bottom the field looks like this
7 - 4 - 1
8 - 5 - 2
9 - 6 - 3
Spot 8 is your leader. Spots 7 and 9 have the lowest priority in term of attacking in a turn, meaning they will attack last. Putting Angela in spot 9 means that she will complete her taunt on the second round, after every other unit on the field has attacked (except maybe the enemy unit in position 9 depending on speed), effectively taunting everyone for these 2 whole turns, never missing anyone. The fuller the board is, the more time a round will take to conclude, the more time Angela will taunt the board.
I would argue that you would want to place your Anna in spots 7 or 9 as well, since it gives you the most time to react to a Fenebeth curse, either by giving you time until Anna's turn comes to attack (thus using her unique and dropping you low) in order to dig for Rikia, Ming, or even Jason to prevent her rage from reaching full (you will take less damage from Jason healing you while cursed than letting Anna using her unique attack).
Also, since the curse on a unit ends when 2 rounds have passed (meaning it has used it's normal attacks 2 times - or it was stunned for one of them) there is this interesting scenario. If Anna and the Leader have both the same amount of rounds left for the curse (which will always be the case unless you want to kamikaze yourself by dropping her on the board while cursed), if your Anna is in any spot except spot 9, she will act first, and if she has enough rage for a unique, she will hurt your leader and all the units after her. If she is placed at spot 7, she can only hurt the leader and the unit in spot 9 (always assuming this is the last round of the curse). If she is in spot 9, all other units will have been freed from the curse more than likely. There is a scenario where they place Fene down JUST before Anna attacks, making her the first to be freed from the curse (since 1 round on her is immediately consumed) thus this doesn't work, but it is such a corner case, and most people don't play around this concept. Bottom line when trying to maximize Anna vs Curse, you care about the leader HP, not as much for your units’ HP, so placing her like that at spot 9 can help a lot in dodging curse damage.
Likewise, you don't want Anna on the first 3 spots ever, because of the curse symmetry (Anna will be one of the first units to be freed but the rest will still be cursed) and because you don't want them to have the chance to pressure her with uniques to gain rage and force you to heal while cursed. If you really want to place Anna in the front row, try doing so in a lane where an enemy Miyuki is, because she will keep your Anna from using her unique, playing around curse.
On the other hand, you want your important unique related units in the front row, in order to gain rage faster. For me those are Miyuki, and Fenebeth (since I have Nail on her) as well as Jason. Thus you need some amount of survivability on them (thus the Pegasus shoes on Miyuki, and the TShirt on Jason). Also, with Fene and Miyuki being the units that die more often due to being in the front row, Jason will most of the time revive one or the other, which gives you tons of advantage either way. Also, Miyuki in spot 1 means that she might as well be the first unit to use a unique each round, keeping the whole enemy board low on rage You could try and frontline an Awakened Ming as well, in order for her to cleanse more effectively, but gear her accordingly.
Grant should always be put in front of your leader, and don't make the mistake of putting him in spot 2, he can tank, but he cannot tank everything forever. Best (and only) space for him is spot 5, just in front of your leader. Keep this in mind even early on when you are deploying units, in order to always keep that spot open. In front of Grant, Kiraya is the best. Spot 2 is hers almost exclusively in order for her to pummel down enemy midlane Grants and other squishy units. If she is not early to the party though, don't be afraid to put Miyuki Fene Jason or Phoebe (or even Selena) in front of Grant, he makes anyone in front of him immune to AoE, and the midlane is the best to gain a lot of rage early on.
If your Kiraya is not on mid, keep in mind you cannot shield your leader effectively anymore (since apart from the first Awakened Anna unique, you are not guaranteed to get a shield due to Fene reasons), unless you have the Selena passive of course, so you will need to space out your deployment to keep it up.
Moreover, as I said before, decide kinda early which lane you will use your Angela in vs Axe (top or bottom). Try to put your whalepin units in that one so that they can trigger their pins more easily, while keeping the ones you want to survive on the other lane. Putting Angela and Miyuki (without pin) in the same lane is not recommended, kinda an unnecessary suicide move.
Lastly, having a full board is nice, but try to reserve one or two spots for the last minute cheese, don't be greedy with deploying a Selena for example when you only have 2 spots left (since she doesn't offer much) and you suddenly cannot use Diana, Fene, or a cleanser.
And that’s all! This is most of, if not all of my Druid Knowledge as of now. It was really fun writing this guide, and I hope that I helped anyone reading it! If you have any more questions, shoot them my way on the IC Discord, I can help clarify things more over there!
That’s it from me, hope to see you around in Ares Battlefield!
Log in to comment